Setting up Branch Level Inventory Availability
The Product Availability Module dynamically displays the available inventory based on the availability mode you set for the product. There are two applicable modes that you can use to display availability at the branch level: one displays the actual inventory by branch and the other displays whether the inventory is in or out of stock by branch. Both of these modes start out showing the availability at the home branch and collectively all other branches but web users can interact with the module as described below.
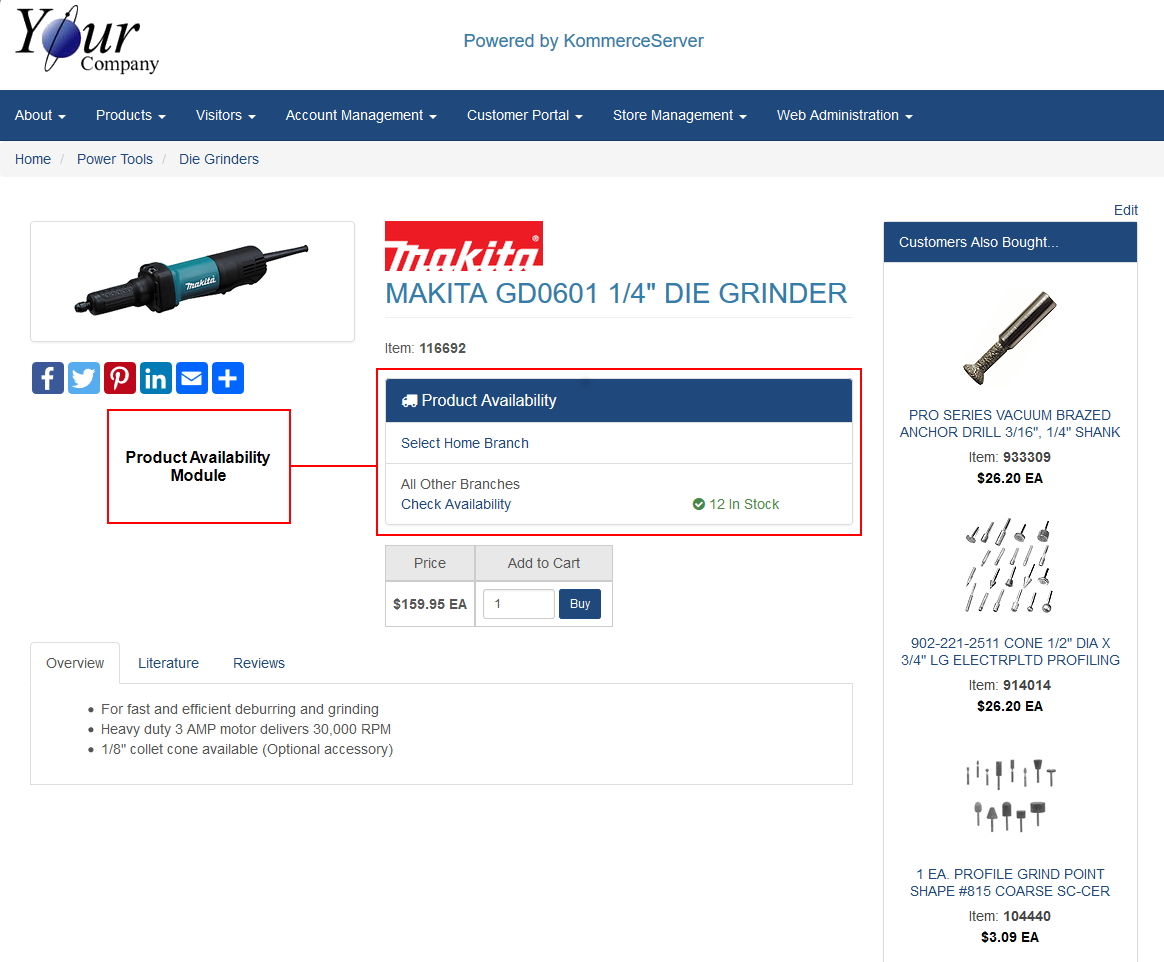
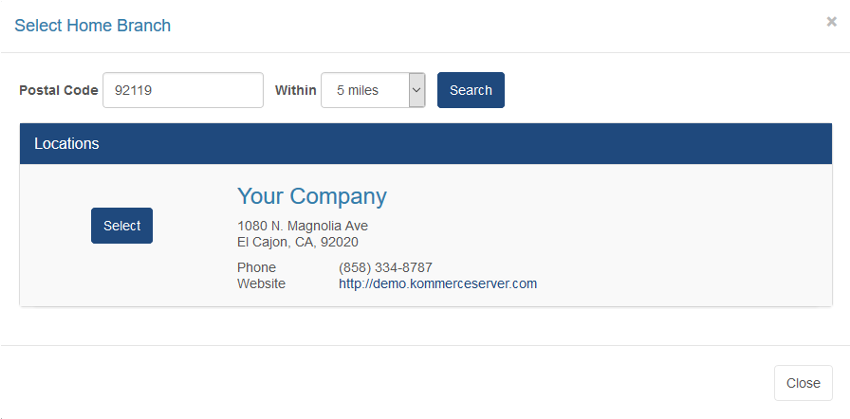
The Product Availability Module allows users to select a home branch location and see availability in other nearby branches. Existing customers that are signed into the website will automatically have their home branch selected if it is specified in the back office. Once a user selects a home branch, the inventory levels for that branch will continue to be displayed on the products they view during that browsing session.
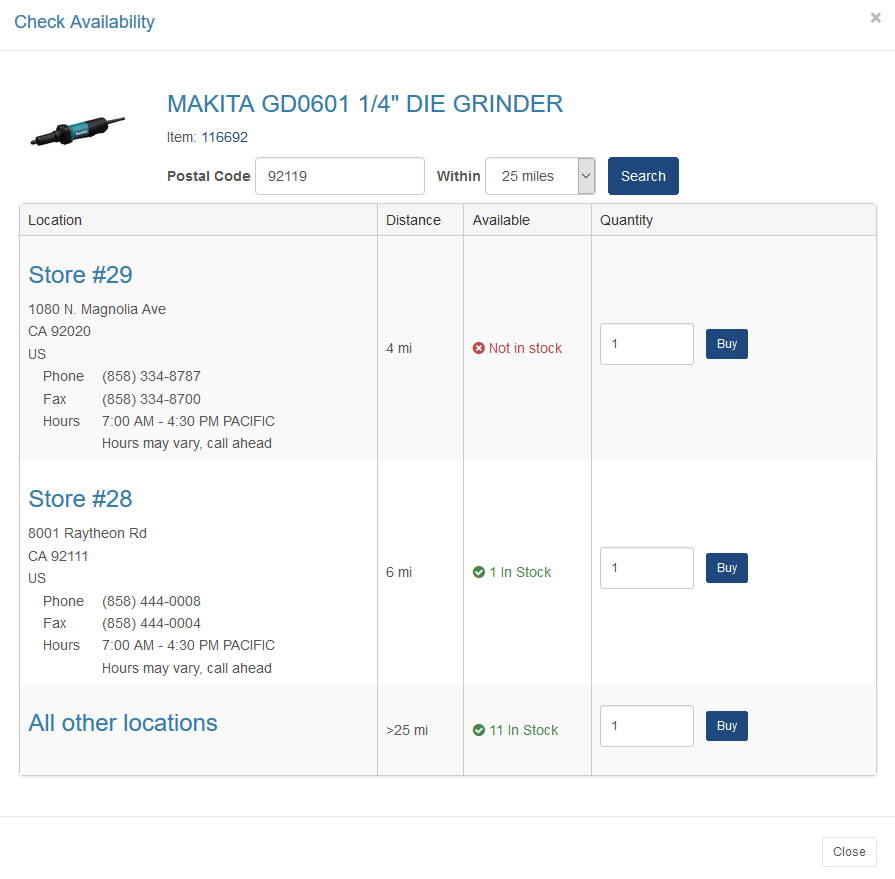
Users can check availability for other nearby branches if the home branch is out of stock.
Setup Process
The following sections describe the actions that are required for setting up branch level inventory availability.
Ensure that Applicable Information is Being Sent from the Back Office
The KS_INVENTORY, KS_CUSTOMERS, and KS_SHIP_ADDRS APIs are the Kore Commerce APIs that send up the applicable information. Following is a list of the applicable fields used for this feature by API. The common fields referred to by all three APIs are Site ID and Site Name, which represent the branch or store identifier and store name.
|
API Name |
Usage |
Data Fields to Import |
||||||||||
|---|---|---|---|---|---|---|---|---|---|---|---|---|
|
KS_INVENTORY |
This API sends up the available inventory by part by branch. |
|
||||||||||
|
KS_CUSTOMERS |
The Site ID and Site Name in this API represents the home branch for the customer's primary address. |
|
||||||||||
|
KS_SHIP_ADDRS |
The Site ID and Site Name in this API represents the home branch for this alternate address location for the customer. |
|
Define your Agency as an Inventory Agency and Add Store Locations
In order for your profiles to show branch level item availability, you must define an agency for your branch locations as an inventory agency. Agencies are used for a number of purposes and have a lot of information, however only a subset of information is necessary in order to enable the product availability control on your product listings.
Perform the following steps to define your agency as an inventory agency on your Kore Commerce system and add store locations.
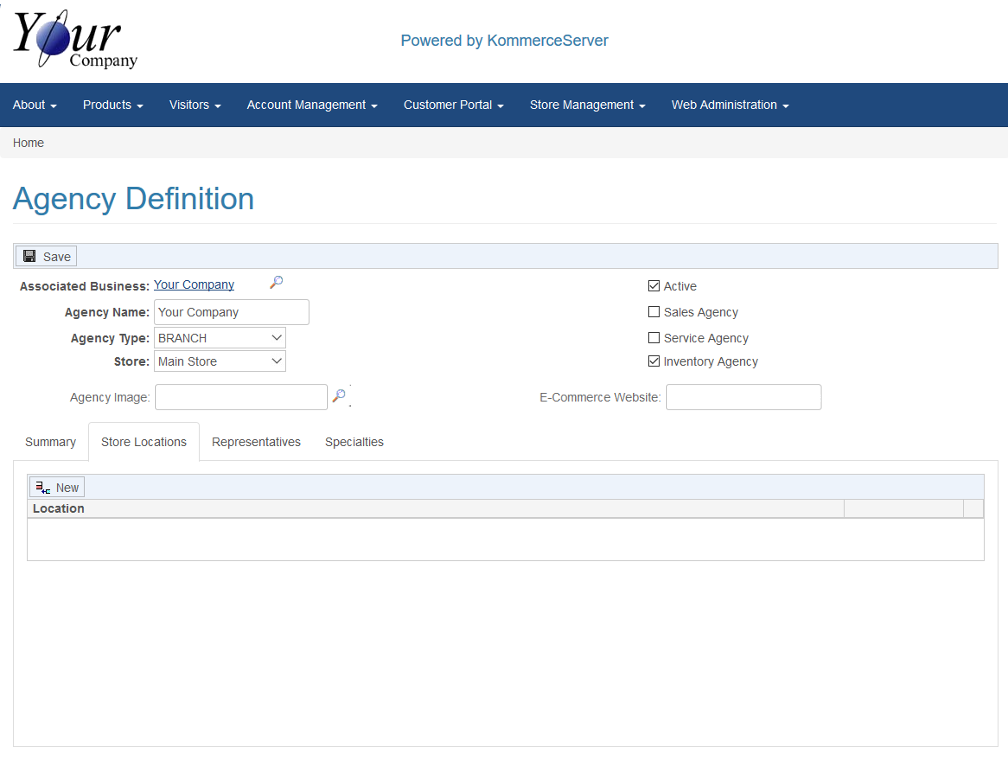
- Open the Agency Definition page for the agency for which you are defining as an inventory agency. If you do not have an existing agency created for your company, you can create one by following the procedure in the Adding a New Agency topic. The Agency Definition page appears.
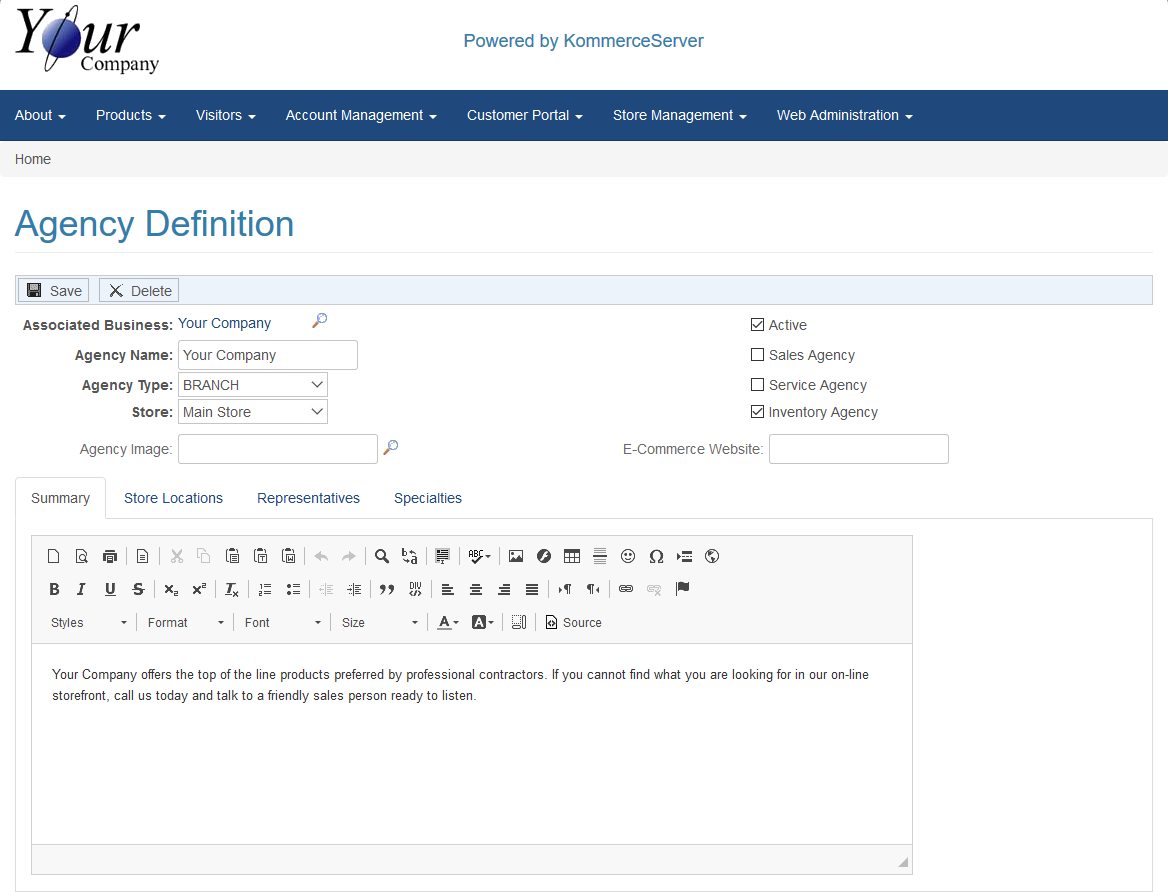
- Ensure that the Active and Inventory Agency checkboxes are selected.
- Click the Store Locations tab. The Store Locations area appears below.
- Perform the following steps to add a store location to your agency.
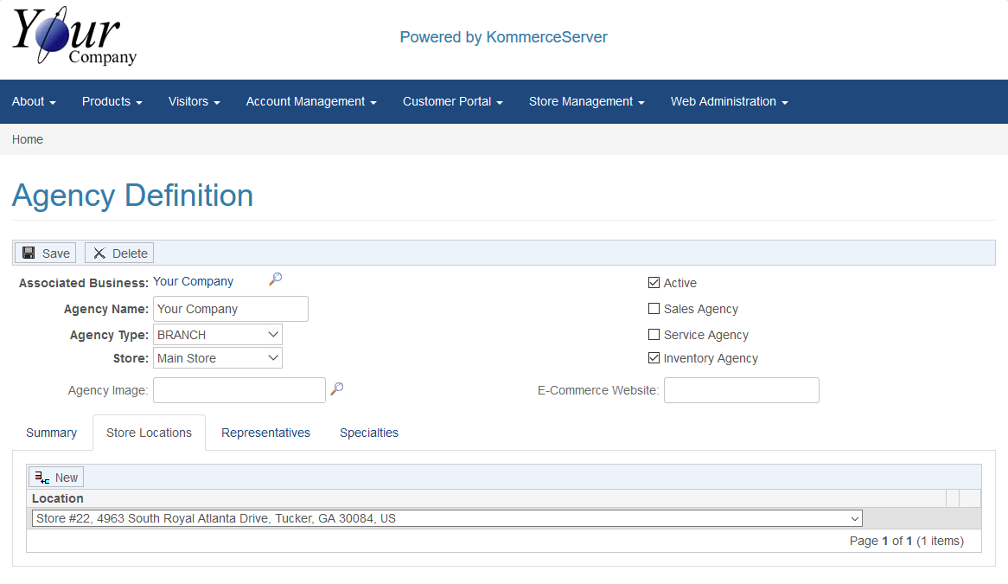
The drop-down menu is a list of store locations for the associated business. If you cannot find a store location in the Location drop-down menu that appears when you click the New button, you must add the desired store locations to your KommerceServer system on the Agency Home page. Refer to the Adding a New Store Location topic for details on how to accomplish this task.
- Continue to select additional store locations as needed.
- Click Save to save your changes.
Enable your Item Profiles to Show Branch Level Availability
In order for your profiles to show branch level item availability, you must choose between one of the two availability modes that are supported.
- In or Out of Stock by Branch - Displays whether the product is in or out of stock by branch but does not show inventory quantity levels.
- Branch Quantity on Hand - Displays actual inventory quantity levels by branch.
To Modify an Individual Item Profile to Show Item Availability by Branch
- Navigate to the product page for which you want to show item availability. The product page appears.
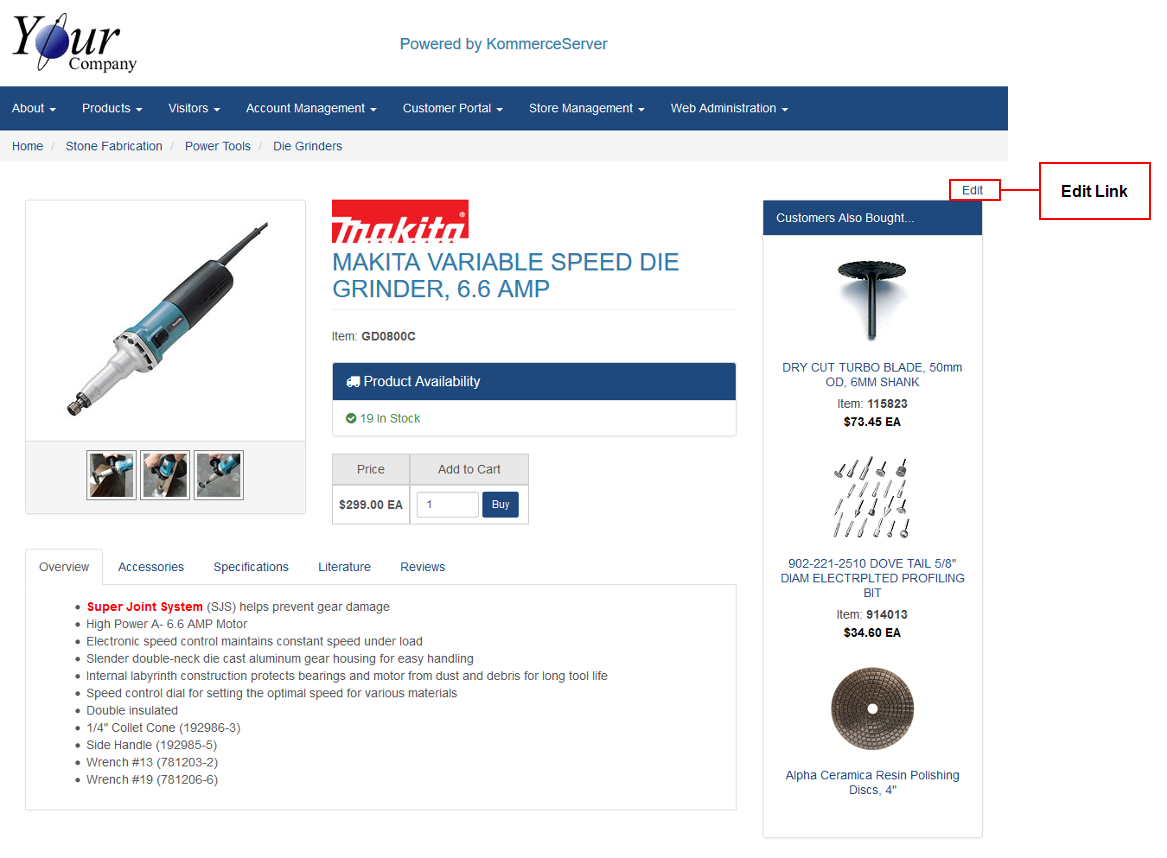
- Click the Edit link. The Item Profile Definition page for the item profile you selected appears.
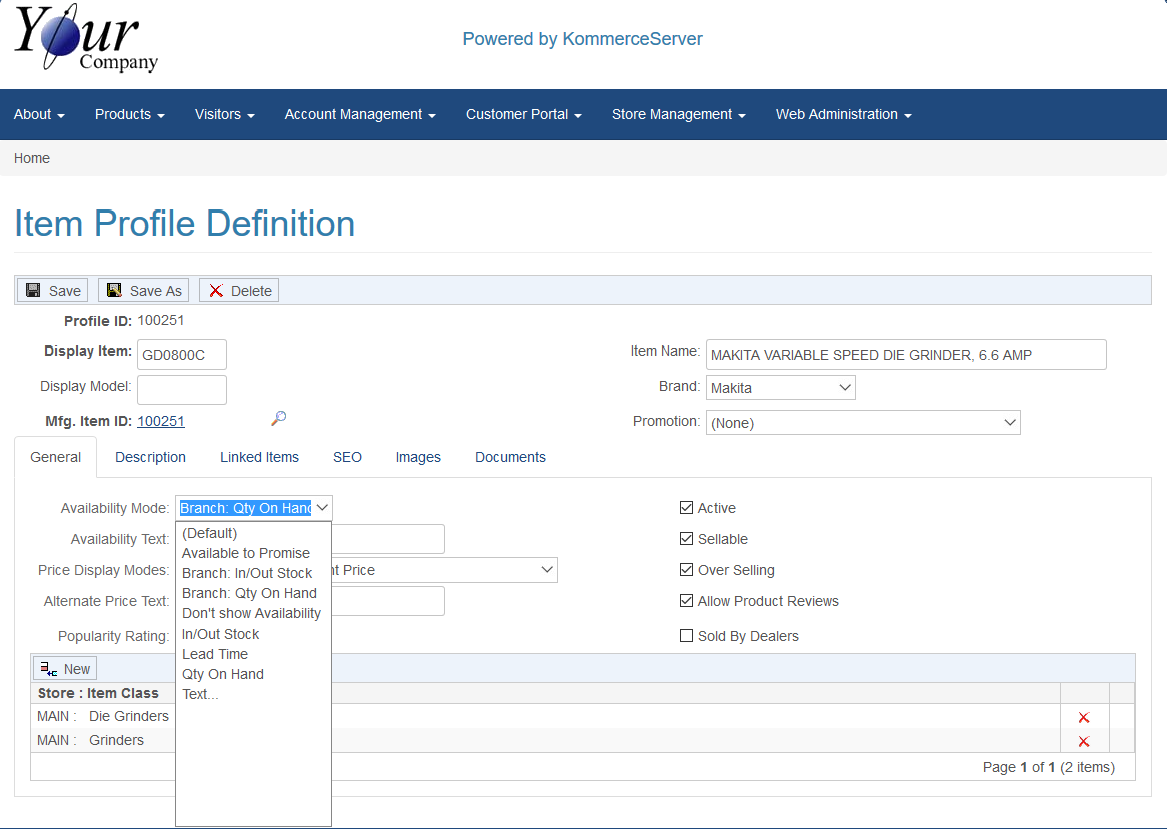
- Choose one of the following options in the Availability Mode drop-down menu. There are multiple availability options in the Availability Mode menu as shown above but only the options that are relevant to item availability are described here.
|
Item Availability Option |
Description |
|---|---|
|
Displays the default setting for the product_availability_method option in your web.config file. Refer to the section below for more information. |
|
|
Branch: In/Out Stock |
Displays whether or not the item is currently in stock but will not show the actual quantity on hand, which may be sensitive to show to your users. |
|
Branch: Qty On Hand |
Displays actual inventory levels for the item at each of your store branches. Keep in mind that the inventory quantity comes from the back office and is typically configured to be the Available to Promise quantity rather than the physical quantity on hand. |
- Click the Save button to save your changes.
If you want to predominantly use one display mode for your profiles over the other, you can configure your web.config file to display that mode by default. By doing so, you will not have to explicitly set the availability mode for each profile. If you want certain item profiles to use a different item availability mode, you can edit the individual product profiles to display the item availability of your choice. Any changes you make to the item availability in item profiles individually will override the changes you make in your web.config file.
To Modify the web.config File to Show Branch Level Item Availability
Enter one of the following options in the value= field for the product_availability_method setting in your web.config file.
|
Value Option |
Description |
|
|---|---|---|
|
"BOH" |
In/Out of Stock by Branch |
|
|
"BQOH |
Branch Quantity on Hand |
The product availability change you make to the web.config file will only appear on the product listings when the Default option is selected in the Availability Mode drop-down menu for your item profiles. This option will be set to Default in each of your item profiles unless you change them manually. Refer to the instructions in the section above for information on changing your Availability Mode settings in your item profiles.